How to change the username accounts of the Jira Internal Directory using Python script |
您所在的位置:网站首页 › user admin pwd › How to change the username accounts of the Jira Internal Directory using Python script |
How to change the username accounts of the Jira Internal Directory using Python script
|
プラットフォームについて: サーバーと Data Center のみ。この記事は、サーバーおよび Data Center プラットフォームのアトラシアン製品にのみ適用されます。 The content on this page relates to scripts that are supported; however, the content is out of the scope of our Atlassian Support Offerings. Consequently, Atlassian cannot guarantee support. Please be aware that this material is provided for your information only and you may use it at your own risk. 目的This document contains a programmatic script developed in Python 3. The intent is to update and change the Jira Internal Directory username of 1000 users by executing this script. The only remaining unchanged username will be the one used to run the script. The idea is to speed up the massive username changes, especially in cases there are a lot of users that required updates. A use case you may apply the below solution would be a migration from Jira on-premise to Jira Could (or vice-versa) for instance. The migration process is not a trivial task. There are many plans, verification, and steps to perform. The user migration is one step and adjusting the usernames, email addresses are very common to math with the destination Jira instance pattern. As an example migrating the users from Jira Cloud to Jira Server or Data Center. In Jira Cloud, the usernames are set as email addresses and you may not want to use the email address as the usernames in your new Jira on-prem instance. For more details about the migration steps please see Migrating from Jira Cloud to Server applications. Another example is the migration from Jira Server or Data Center to Jira Cloud. The Use the Jira Cloud Migration Assistant to migrate states: In Cloud, all users must have valid and unique email addresses. Any emails that don’t meet these requirements will block your migration.That means a bulk change may be required to update the email address of all Jira Internal Directory users. Then you may adapt the below script to change the email address instead of the username (it will require a Python developer skill). In some cases, the use case could be a migration from internal to external user management like LDAP, AD, etc, the username pattern is not the same and must be changed. 環境Jira 8.22.xJira 9.xソリューションIt is recommended to use the Jira REST API or Jira UI to make changes in the usernames as described in the Update username and email using REST API or the database. A sample script was written in Python 3 and the objective is to update the username with the email address value (at the end the username and email address will have the same value) for all Jira Internal Directory users. From the Jira UI, we can see 3 users with different values to the username and email address
The requisites to run the below sample script are: Python 3 must be installed and running in the machine that will run the scriptUse a text editor to copy and paste the configuration file config.json { "host":"", "user":"", "passwd":"" }Replace the with the system administrator user, the with the corresponding user password, and with the Jira base URL. For example: config.json { "host":"https://instenv-83061-pyaa.instenv.internal.atlassian.com", "user":"admin", "passwd":"n3KGWC9VZ2dloVad55mjjiFE" }Save it named as a config.json file. In this example, it is using the basic authentication mechanism. Please see the Security overview for more methods. Use a text editor to copy and paste the script to save it as a Phyton fileCopy the below code: get_and_change_all_users.py #!/usr/bin/env python3 import requests import json import base64 # Read the config.json file to get the Jira URL, user and password. with open("config.json") as json_data_file: data = json.load(json_data_file) jiraURL = data["host"] username = data["user"] pwd = data["passwd"] # Base encode your username and password # The user in this example is admin b64 = username + ":" + pwd cred = "Basic " + base64.b64encode(b64.encode("ascii")).decode("utf-8") # Set header parameters headers = { "Accept": "application/json", "Content-Type": "application/json", 'X-Atlassian-Token': 'nocheck', "Authorization" : cred } # Querying a 1000 users query = ".&includeActive=true&includeInactive=true&maxResults=1000" # Update your site url url = jiraURL + "/rest/api/2/user/search?username=" + query pUrl= jiraURL + "/rest/api/2/user?username=" # Send request and get response response = requests.request( "GET", url, headers=headers ) # Print the response in case you want to see what is comming # print(response.text) # Decode Json string to Python json_data = json.loads(response.text) # Update the usernames to the exists email address # The user named admin is the user to connect and will not be updated to not loose the REST API connection # The admin user will required to be updated in the Jira UI later for item in json_data: if item["name"] != username: # sending put request and saving response as response object userUpdate = {'name':item["emailAddress"]} payload = json.dumps(userUpdate) putURL = pUrl + item["name"] req = requests.request("PUT", putURL, headers=headers, data=payload) # print response of request print(req.text)Save the script for instance as get_and_change_all_users.py in the same folder you saved the config.json file. Please note to run that script you need to have Python 3 running and you could use the below command in a terminal or command prompt: python3 get_and_change_all_users.pyAs a result, the user information changed will be printed in the terminal or command prompt. In this case, 2 users were updated: {"self":"https://instenv-83061-pyaa.instenv.internal.atlassian.com/rest/api/2/[email protected]","key":"JIRAUSER10100","name":"[email protected]","emailAddress":"[email protected]","avatarUrls":{"48x48":"https://www.gravatar.com/avatar/b6621b81cf475d12b6791c2819bd938e?d=mm&s=48","24x24":"https://www.gravatar.com/avatar/b6621b81cf475d12b6791c2819bd938e?d=mm&s=24","16x16":"https://www.gravatar.com/avatar/b6621b81cf475d12b6791c2819bd938e?d=mm&s=16","32x32":"https://www.gravatar.com/avatar/b6621b81cf475d12b6791c2819bd938e?d=mm&s=32"},"displayName":"Franklin Ayres","active":true,"deleted":false,"timeZone":"UTC","locale":"en_US","groups":{"size":1,"items":[]},"applicationRoles":{"size":1,"items":[]},"expand":"groups,applicationRoles"} {"self":"https://instenv-83061-pyaa.instenv.internal.atlassian.com/rest/api/2/[email protected]","key":"JIRAUSER10101","name":"[email protected]","emailAddress":"[email protected]","avatarUrls":{"48x48":"https://www.gravatar.com/avatar/ea5d658ea0d2e5e29830df291616e089?d=mm&s=48","24x24":"https://www.gravatar.com/avatar/ea5d658ea0d2e5e29830df291616e089?d=mm&s=24","16x16":"https://www.gravatar.com/avatar/ea5d658ea0d2e5e29830df291616e089?d=mm&s=16","32x32":"https://www.gravatar.com/avatar/ea5d658ea0d2e5e29830df291616e089?d=mm&s=32"},"displayName":"Franklin Test1 Ayres","active":true,"deleted":false,"timeZone":"UTC","locale":"en_US","groups":{"size":1,"items":[]},"applicationRoles":{"size":1,"items":[]},"expand":"groups,applicationRoles"}And by refreshing the Jira user management page the updated usernames will be displayed: 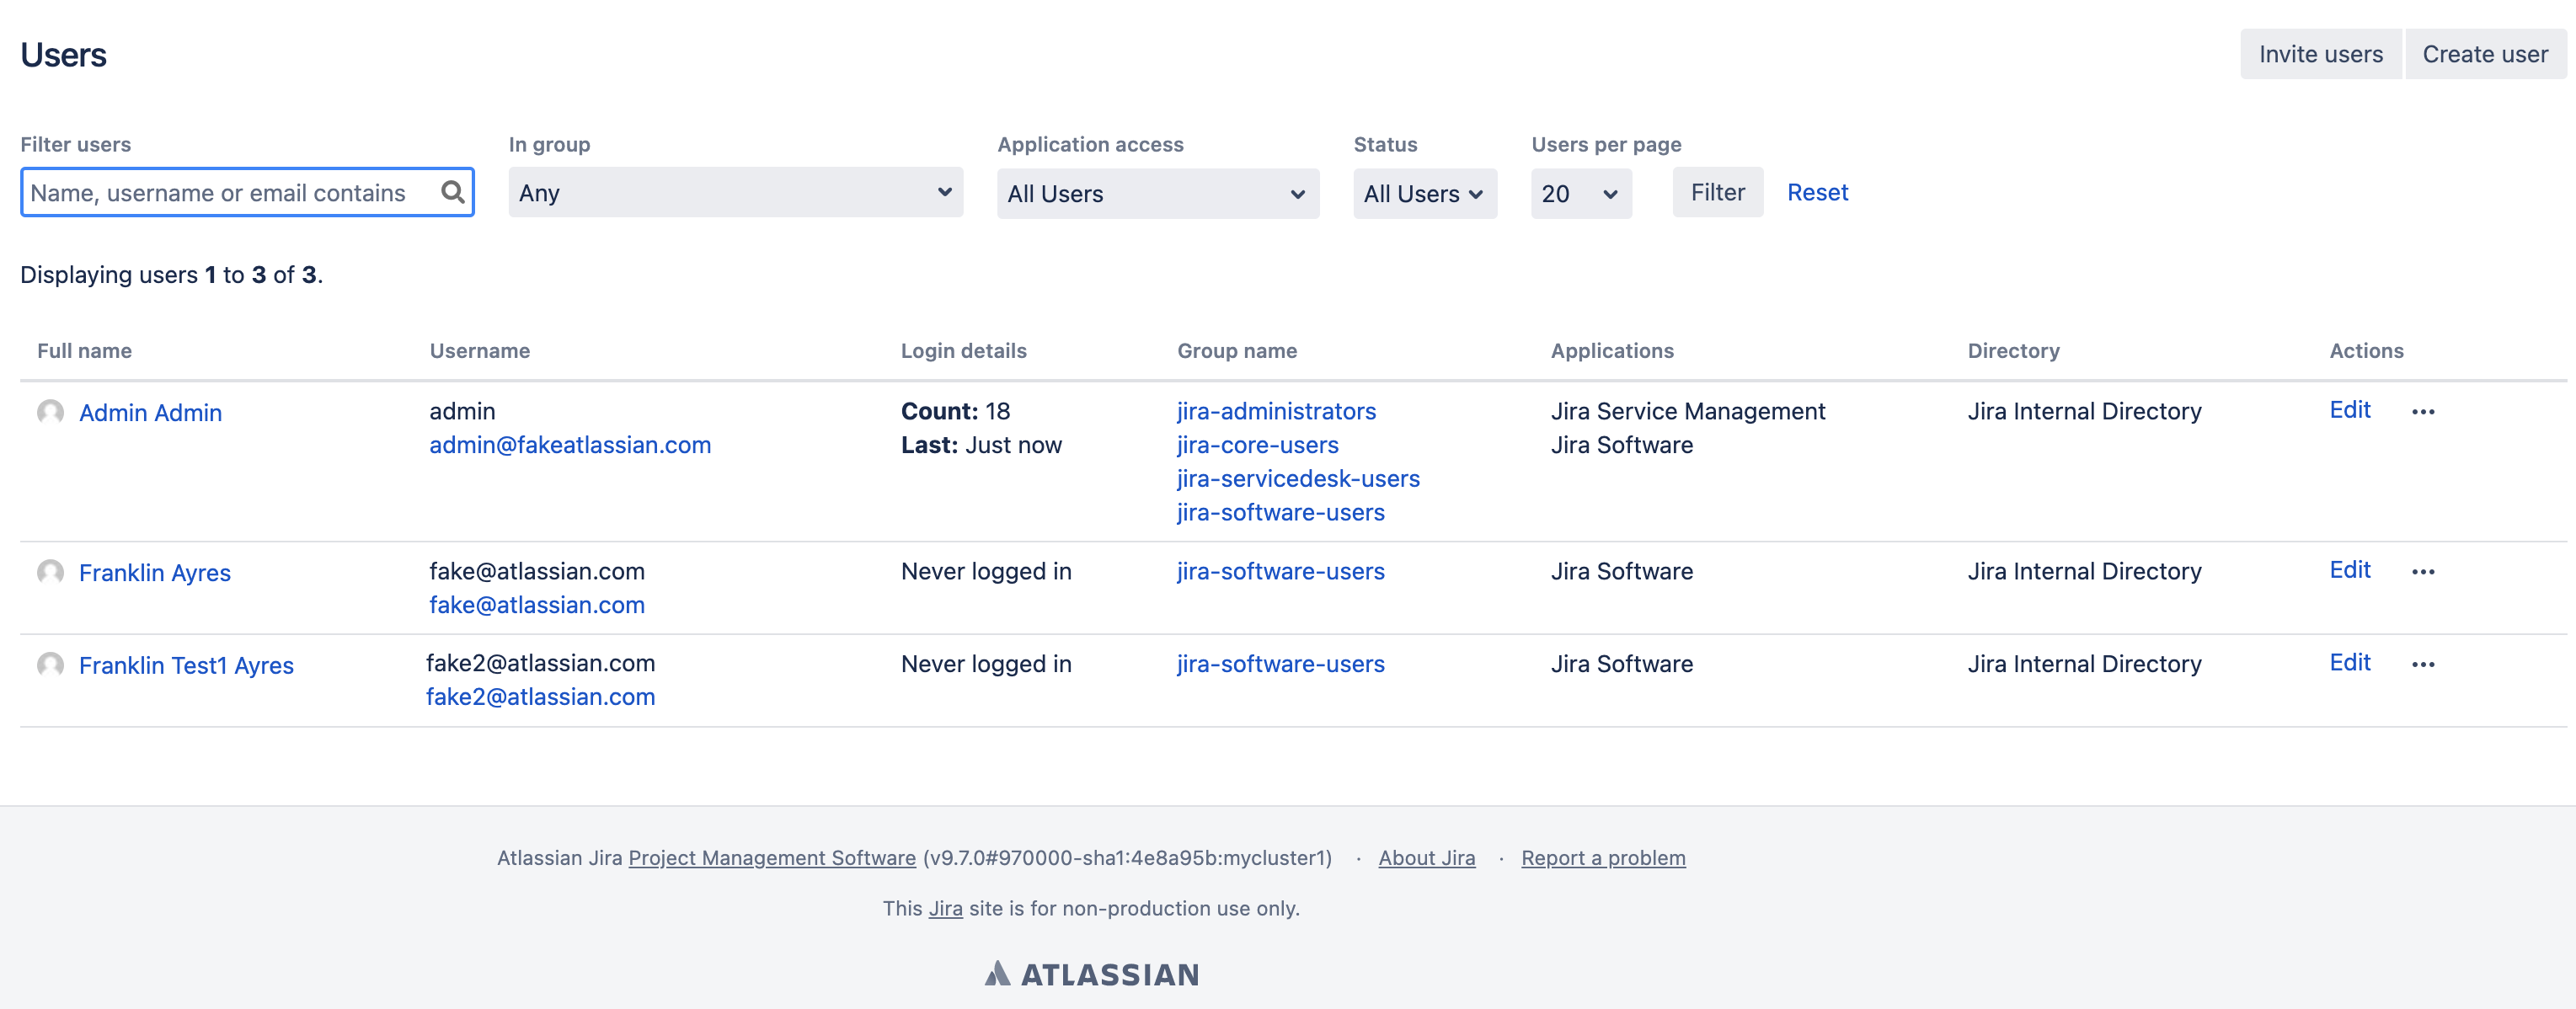
|

【本文地址】
今日新闻 |
推荐新闻 |